Concours d’Elegance Car Show Preparations

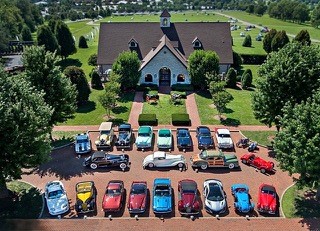
To be invited or nominated to show your car at a Concours d’Elegance is like being invited to New York Fashion Week – only for cars. The Concours d’Elegance circuit is the highest form of car show in America. Picture cars you have never even dreamt of, shown off to the highest degree. Among these drool-worthy cars, is a car culture exclusive to the most exuberant enthusiasts.  

            The first thing that is required of a Concours d’Elegance is sending pictures of your car with some information about it.  Depending on which Concours d’Elegance show you enter, they normally want anything from two to six pictures of your car.  The pictures should capture the front and the back if two is all they are looking for.  If more than two pictures are required, then they will ask for pictures of the front, back, interior, engine compartment, etc.

  Once you have your pictures, you then must fill out forms or type up a brief history of your car, depending on which Concours show you are entering.  If the show requires you to write a brief history of your car, make sure that you include the year, make, model and information that makes your car unique. The back story on your car can make a huge difference in whether your car gets picked to enter a Concours d’Elegance show or not. So, I would also suggest doing some research on your car because you could possibly have a car that someone famous once owned or it could be a rarity. Once all information and pictures have been turned in, then the waiting game begins.

If you get the acceptance letter from the Concours d’Elegance show, then CONGRATUALTIONS!!!! With being accepted into the Concours d’Elegance show, it is now time for you to check your car over for any issues that can cause point deductions during judging.  Some things to consider when looking over your car: the condition of the paint job, working condition of all components, parts needing to be replaced, fluid leaks, correct decals applied and in the correct places, and finally, CLEAN your car!  You should gather all your informational papers, photos of the build or other documentation that you have about your car that you may want to show the judges when they make their rounds on the show field.  Review the current Concours Judging Guidelines, if available, for current general show and safety requirements.

 When it comes time to go, you need to prepare a detailing bag because you will use these items throughout the show to keep your car “groomed”. Another suggestion I would make before leaving for a car show is to make sure your insurance will cover everything. I bring up the insurance because nothing would be a bigger disappointment if something were to happen and you did not have the coverage that you thought you had.  You should make sure you have allotted yourself enough time for traveling, because incidents like traffic congestion, having a wreck (hopefully not, but you cannot control other people!), or if your car breaks down do happen and should be accounted for.

Another suggestion before leaving is to make sure you have packed the correct attire for the show.  I say this because you do not want to present your car to a judge and have grease, holes, frays, etc., in your clothes.  Not saying you must pull out a suit, but WORK clothes probably would not be the best attire for these shows.  Keep in mind, most of these cars that are being presented have anything from five hundred thousand to one and half million dollars invested in them and looking like you just walked out of the garage is probably not the best look.  Another option at some Concours is to dress in the era of your car. This adds a bit of fun “period ambience” to the event and there may even be awards for “Best Dressed”!

            Upon the arrival to the car show, you should be ready for more work.  The first thing you should do is get your car’s show packet.  Even though your car was thoroughly cleaned and checked over for problems before leaving the garage, you still need to go around again and check for any issues. During your drive, your car can pick up things like dust, pollen, or any other particle that floats in the air.  I also suggest checking all your wires, plugs, etc. because anything could have loosened up during the drive.  Basically, you’re going to repeat your check over as you did before you left the garage because small things can cause your car to lose points. You would not want that, because we want that recognition! 

During the show you will also have to maintain your car’s appearance because, just like while traveling, it will get dust, pollen, etc. on it and you will want your car looking superb when the judges come around. While reading Tim Suddard’s March 12, 2014 article in Classic Motorsports – Understanding the Concours Game, it suggested you should not over do the cleaning, for example make your “blacks black and every other contrast correct.”  So, NO shiny black rubber!!!  Remove any and all excess items from the interior and trunk of your car, including floor mats and display items.

You or a handler must be present at your car while the judging team is evaluating it.  Be attentive to what the team is doing, stand back out of their way, and refrain from engaging them in conversation until you are asked.  Be prepared to open the hood, trunk, and doors upon request.  You may be asked to start your car and demonstrate that all of the lights, signals, and the horn work. If you are asked questions about your car, make sure you or your handler know all the ins and outs of your car because this can determine if you win your class or not. Another suggestion from the article in Classic Motorsports – Understanding the Concours Game is while talking with the judge, help the judge understand the process you went through restoring your car. After the judges leave you can take a deep breath and relax!

People will be walking around looking and may take notice of your car, so be prepared for questions from the curious bystanders. While you are cleaning and talking about your car, you should be aware of what is happening around it.  Most people at a car show will have respect for the cars and its owner, but like most things in life you always have that one person!  So, the best advice is to never leave your car by itself, and always have someone you can trust stand near to watch your car.

If your car wins in its class then CONGRATS, but it does not end there.  You will drive your car upon the stage and received your award and take a picture (up a few paragraphs is why I suggested watching what you pack) and then you will drive to the winner’s circle. Once in the winner’s circle, you will then be judged again for Best in Show. While in the winner’s circle, the honorary, senior judges, and maybe a few more judges then walk around and look at each car to decide which vehicle they think deserves the award Best in Show.  In addition to the Best in Show, there are other awards that each Concours d’Elegance offers as well.

            The end of the show preparation is not really all that complicated.  You must pack up all your stuff you brought to the show and be off the show field by a certain time.  With a mass amount of people all trying to achieve the same thing at the same time, it can get frantic.  You will have to be aware of your surroundings and make sure nothing happens to your car while in the escaping process. Once your car is loaded up, then you will be heading back to your hotel. 

Upon the arrival at the hotel, you may have to find a space that is big and safe enough for your truck and trailer to park. With some hotels, their parking lots can be tight and having to park your truck and trailer and find a safe place from those “bad-drivers” can be a challenge in itself. A Concours d’Elegance stands as the epitome of a car show, but at its heart it is still just that – a car show. If you are blessed enough to be invited, enjoy the stress of preparing, talk to the other entrants and observers, and overall, just have a good time. Car people are car people, this is just major leagues.

Concours d'Elegance
Keeneland Concours d’Elegance winner circle in 2017. Graveyard Run Restorations has two car in the winner circle – 1937 Chrysler Imperial C-14 convertible and 1954 Buick Roadmaster.

AACA Car Show Prep – Before, During, and After

Hey guys I am back and sorry for not having a blog for 2021 yet, but here we are now. 

            With the outbreak of COVID-19, things have been a little wonky for everyone, especially with car shows.  In October of 2020, the Hershey Region AACA had to cancel their first show ever since 1954.  With 2020 behind us, Graveyard Run Restorations is planning on making the Hershey Show our first car show for the year. If you have ever showed your vehicle, you will know that there is always a mile-long list of things to do before, during, and after the show. In this blog I am going to give some suggestions on how to prep for an AACA Car shows.

            As stated above, GYR plans on attending its first show for 2021 at the Hershey Region AACA Eastern Fall Meet.  Before you ever step foot on the show ground as an entrant, your first step includes joining the Antique Automobile Club of America, or AACA. (click on the AACA link if you would like to be a AACA member )   Once you are a member, you can then register your vehicle for whatever shows the AACA hosts that you wish to attend, as well as any extra events that occur during the shows or meets. You would think this is it, but NO! Before your vehicle ever leaves the garage, you should check it over for any issues that can cause point deductions during judging.  Some things to consider when looking over your vehicle: the condition of the paint job, make sure all components are working properly, check out your engine bay for any parts that may need to be replaced, check for fluid leaks, make sure your vehicle has the correct decals applied and in the correct places, and CLEAN your vehicle. Once the vehicle is clean you want to make sure that your vehicle has the right badges properly applied if it has won any prior awards at AACA shows.  (Examples – National First Prize badge, Senior tab, Grand National badge).  You may also want to bring any informational papers, photos of the build or other documentation that you have about your vehicle.  Review the current AACA Judging Guidelines Handbook, if you have one, for current general show and safety requirements. Cars must be driven onto and off of the show field and approved fire extinguishers are required. Typically, the guidelines for judging can either be found through the AACA club or online.

 When it comes time to go, you need to prepare a detailing bag because you will use these items throughout the show to keep your car “groomed”. Another suggestion I would make before leaving for a car show is to make sure your insurance will cover everything. I bring up the insurance because nothing would be a bigger disappointment if something were to happen and you did not have the coverage that you thought you had.  Whether you are hauling or driving your car, that is a whole other thing to focus on. You should make sure you have allotted yourself enough time for traveling, because incidents like traffic congestion, having a wreck (hopefully not, but you can’t control other people!), or if your vehicle breaks down.

            Upon arrival to the car show, you should be ready for more work.  The first thing you should do is get your vehicle’s show packet.  If you have multiple vehicles, you then have to make sure the correct packet is with the correct vehicle.  After packets are distributed to the correct vehicle, it is time for your vehicle to be pulled out of the trailer and then driven to its spot on the show field.  Even though your vehicle was thoroughly cleaned and checked over for problems before leaving the garage, you still need to go around again and check for any issues. During your drive, your vehicle can pick up things like dust, pollen, or any other particle that floats in the air.  I also suggest checking all your wires, plugs, etc. because anything could have loosened up during the drive.  Basically, you’re going to repeat your check over as you did before you left the garage because small things can cause your vehicle to lose points. You would not want that, because we want that that heavy trophy and the recognition! 

During the show you will also have to maintain your vehicle’s prettiness. Just like while traveling, it will get dust, pollen, etc. on it and you will want your vehicle to shine like a new dime when the judges approach it.  Make sure your vehicle’s class windshield card is in place and that the judging form is available to the judging team.  Remove any and all excess items from the interior and trunk of your car, including floor mats and display items. You must be present at your vehicle while the judging team is evaluating your car.  Be attentive to what the team is doing, stand back out of their way, and refrain from engaging them in conversation unless you are asked specific questions which is usually done by the team leader.  Be prepared to open the hood, trunk, and doors upon request. After you are judged you can take a deep breath and relax!  It is now time to put out your informational items and photo books if you so desire.  People will be walking around looking at cars and may take notice of your vehicle so be prepared for questions from the curious.

While you are cleaning and talking about your vehicle, you should be aware of what is happening around your vehicle.  Most people at a car show will have respect for the vehicle and its owner, but like most things in life you always have that one person!  So, the best advice is to never leave your vehicle by itself, always have someone you can trust stand near to watch your vehicle.

            The after show packing is really not complicated but you still have a list of things to do.  You have to pack up all of the stuff you brought as well as get the car off of the show field by a certain time.  With a mass of people all trying to accomplish the same thing at the same time, it can get hectic.  You will have to be aware of your surroundings and make sure nothing happens to your vehicle while in the exiting process. Once your vehicle is loaded up, you would then head back to either to your hotel room or head straight for home.  If you are headed to a hotel room you then will have to consider the safest place to park so no one will bother your vehicle and that my friends, is some major paranoia because no one wants anything to happen to their “baby”!

            When all is said and done, it is really not whether you came home with a trophy or came home empty handed.  It’s the good times you had visiting with new and old friends, the beautiful cars you’ve seen, or the places you visited while in the area.  Those memories are priceless.  Trophies and awards are just the icing on my cake!

How to prep for an AACA Car shows

Frame-Off Restorations Process (Part 5 – Reassembly)

Okay guys I am sorry that I did not get any blogs out for November, but between the holiday, the COVID, and family member passing away that made last month crazy for me. I will be only post one this month and that was made possibly by our newest employee Bella Zacchia for helping out with this blog.

Last but not least in the restoration process, we reach the reassembly of the vehicle. The reassembly process takes a significant amount of time due to the preciseness necessary in assembling a perfectly functioning vehicle. Putting a vehicle back together at Graveyard Run Restorations follows the assembly line process in factories throughout history.

            The first step in the reassembly process begins with putting the frame and suspension back together. We start by installing the rear end and suspension on the frame. This includes the rebuilt rear differential (if the vehicle is rear wheel drive), axles, bump stops, and any springs supporting the back of the car. At this point, we will also sort out the front end. Depending on the style of the front suspension, we will install the control arms and ball joints or kingpins, the springs, and the spindles. Any steering components mounted to the frame are installed at this point. Any other part that allows for us to get “wheels on the ground” will also receive the necessary attention. During any point in this process, the brakes and brake lines are built and created respectively. Additionally, we will mount up the master cylinder if it is located under the body or along the frame. If not, the brakes will remain unfinished until the body is mounted. Once the brake lines are installed, the fuel system is assembled on the frame before the body is set down. This includes the tank, fuel sending unit, and lines if none of the system is housed in the body.

            With the suspension installed on the frame, we begin the second step of mechanical and electrical assembly before the body ever comes near the completed chassis. First, we install the drivetrain. The rebuilt engine-either as a short block or long block-and transmission are mounted to the frame. If the car is rear wheel drive, we will install the rebuilt driveshaft, connecting the engine and transmission to the rear differential which finally powers the vehicle into motion. Once this is complete, the frame bushings are installed and then the body is lowered on the frame for mock-up. At this point, we begin the next stage in assembly.

            As we lower the body onto the chassis, we begin the third step-assembling the body. When the body is first installed on the frame, it is simply mocked up. This means that nothing is tightened, and no doors are mounted. As such, the first thing we do is ensure that all our measurements are correct, squared, and in position on the frame. Then we tighten the body down to its final position. With that step checked off we begin mounting the doors, and trunk to the body; all of which are loosely bolted up and then adjusted into their final position in order to achieve the perfect body and door gaps. Finally, if it benefits the completion of the restoration, we will install the fenders. However, for most pre-1950’s cars the fenders will be one of the last pieces installed due to their shape. The team will install and adjust the hood once the engine is finalized to reduce any chance of damage to the piece while the engine is still receiving work.

            At this point final assembly begins, which includes everything to truly finalize a vehicle. The technicians finish step two-assembling the engine. The starter, carburetor, fuel pump, pulley system, alternator, AC compressor, and power steering pump will all mount to the engine if applicable to the vehicle. The radiator and radiator hoses are installed, as well as the heater hoses and A/C components, if the car is so equipped. Mechanical systems such as the brakes and steering linkages undergo final assembly and then are finalized.

            With the mechanical assembly nearing completion, we begin our fourth step-the process of electrical wiring. We run a ground wire from the respective terminal on the battery to the engine block, from the block to the firewall, and from the block to the frame, depending on whether the vehicle is positive or negative ground. This begins our electrical ground system. Constant power-either 6 volts or 12 volts, will be run to the starter, the ignition switch, and fuse panel. Key-on power from the ignition switch will be run to all other components. This includes: the charging system (either an alternator or generator), the fuel system (sending unit, electric fuel pump, and the electric choke on the carburetor (if applicable)), AC and heat, the dash, and all other powered components. After bench-testing each component, we roughly begin running wires to anything already mounted to the frame. This means that we will run power and ground wires along the frame to the fuel pump, headlights, and taillights. This will all be left unfinished until the electrical system is working perfectly. Then, it will be loomed and tied down.

            As we finish mechanical and electrical assembly, the final body assembly begins. We install the hood, fenders, body chrome, and trim. Mirrors and bumpers are double checked and finalized. Here, we shift into assembling the interior. Window regulators, glass, door latches and handles are all installed into the doors. The headliner or convertible top is installed. In the body, sound deadening, jute carpet padding, and the carpet are all installed. The dash and doors undergo final assembling and checks, and once finalized we can install the package tray, seats, and door panels. The trunk will be fitted with the correct liner, jack, and spare tire as well.

 With assembly completed, we begin the extensive process of testing and finalizing the vehicle. We go through each aspect of the car to double and triple check for concours-level quality, top notch drivability and mechanical function, and anything you may have specifically requested. By the time we finish, the vehicle will be better than you could have ever imagined. This process is how we achieve our nationally acclaimed restorations. We hope to see you and your vehicle in our shop soon.

– Hope Everyone has a Merry Christmas and Happy New Year! –

Rachel Richardson and the GYR gang

Frame-Off Restorations Process (Part 4 – Interior and Convertible Tops, Chrome and Stainless, and Windows)

Let’s not forget that with each restoration we have interiors and possibly convertible tops, chrome and stainless trim, and windows.  As with any restoration, these things will take time and are just as important as the rest of the build.

            When it comes to the interior and convertible tops (if applicable) we do them in house or outsource them.  When we outsource, we send the job out to Sharp’s Automotive Upholstery in Ohio. One reason we send the interior and convertible top jobs up North is because they only do top level cars and let’s face it, we always have a rarity in this shop. When performing in house interiors, we use our local automotive upholstery shop to sew all the seat covers, side panels, headliners, door panels, etc.  While our local upholstery shop is sewing up seat covers, we are in the process of preparing the seat frame(s) by cleaning the metal and making any repairs as needed. We also make any panels that are needed in the vehicle and once they are done, we take them down to the upholstery shop to be covered.  Once all the interior parts are ready, we then begin the installation of the headliner, insulation or sound deadener, carpet (if applicable), interior panels, door panels, interior trim, and then seats.

            Chrome is a major factor in the rebuilding process so we send it out for re-plating. We send all our chrome and nickel items to Brightworks in Ohio.  As far as our stainless, we try to keep all the original stainless on the cars and work out any imperfections at Graveyard Run Restorations.  We start our stainless process by inspecting the stainless for any imperfection. We use specialty tools, such as miniature anvils and jewelry tools to repair the dents in the stainless and we also hammer and dolly as needed. Once all the dents are repaired, we then metal file and begin hand sanding the stainless.  Our sanding process begins with 120 grit sandpaper through 600 grit sandpaper. After the first round of sanding is done, we then use our scuff pad wheel on our buffer to show any imperfections or missed spots.  After the scuffing is done and there are no further blemishes, we begin another round of sanding. This starts with 800 grit sandpaper through 3000 grit sandpaper.  With the second round of sanding done, we then go to polishing and buffing using a diamond etch compound polish.  If the stainless is unsalvageable we then purchase new stainless from a forming company in Ohio.

            When it comes to the glass and rubber seals, we always order new.  When ordering the windows, we have to know facts about the windows. For instance, the color of the glass, the dimensions, which seals are needed and the mechanism for the windows.  We have even gone as far as researching which etching is period correct and where it is located on each window.  When we get a vehicle from the 30s and 40s, it is sometimes hard to call up a vintage automotive glass company to get windows.  What makes it so hard is that the vehicle is either rare or the car had such odd shaped windows that they are not reproduced today.  When this problem occurs that means we have to pull out the measuring tape and start sizing things up. No mistakes can be made in the measuring process because specialty made glass cannot be exchanged or returned.  As far as the seals go, in most cases we can get what we need though we have run into problems due to the rarity of the vehicle.  The mechanisms that are used in the windows can be ordered through one of our vendors, fabricated, or we can start a parts hunt on the Internet or amongst our fellow “old guys.

Attention to detail is key to quality work at Graveyard Run Restorations.

Check back soon for more on our blog!

Rachel Richardson and the GYR gang

Frame-Off Restorations Process (Part 3 – Component repairs)

With every vehicle build you will have some component that has to be repaired or replaced. Some examples include starters, generators, A/C systems, carburetors, etc. When Graveyard Run Restorations comes across components in need of repair, we have two choices: to repair them in house or to outsource them.

As mentioned in the disassembly blog, when we outsource work, we can run into problems.  Problems that can prolong the restoration include: long waiting periods, the part we are sending out is a rare part, or the part is in much worse shape than we thought it was.  Once in blue moon, the person that we usually outsource our component to has passed away. Then we have to hunt for someone else who really knows what they are doing.  In the restoration world, not just anyone can do the repairs on these old vehicle components.  It truly takes someone who has been around that era of car or who has been taught by someone who knows the older vehicles, such as the 30s, 40s, and 50s.  Once the disassembly process is done and we know for sure that a part is in need of repair, we go ahead and contact our source and get them lined up for the repair. In some rare cases we even call up our source the same week that the vehicle owner signs the Restoration Agreement.

If we repair the component in house, we can still run into our fair share of problems.  During the component repair we can run into things like the part is so rare that we have to go on a hunt for that one little part to make the component work. As said before, this can take weeks or months.  Another problem we can run into is that no one has the part and we either have to make it or find someone who can make that part for us.  If we do find someone that is capable of making a part for one of the components, it normally does not come cheap.  In some cases, you could spend a $1,000 on a small part that is needed in order for your component to work as it should.  If all goes as GYR wants, a component can be repaired in few weeks. This is with testing it and going through the component to make sure every wire, nut, bolt, knob, etc. is in pristine working condition.  As with every vehicle, there are a lot of components that have to be looked over and this can take a few months to go through everything properly.

Graveyard Run Restorations strives to make sure that your classic vehicle is restored correctly and that it will stand out on the show field.  We also want to make sure you have a safe, sound, and dependable vehicle to enjoy touring the scenic highways with.  This only comes with particular attention to detail and should not be rushed.  The end result will be well worth the time invested.

Check back soon for more on our blog

Rachel Richardson and the GYR gang

Frame-Off Restorations Process (Part 2b – Paint)

——- Sorry I did not get something out last Friday but we had a work interview with a potential employee here at GYR. ——

After the lead process is all done and all the metal has been cleaned and prepped, we then start the paint process. At Graveyard Run Restorations, we start our paint process by laying a coat of epoxy primer on the entire body while in bare metal.  Once the epoxy primer has been applied and dried, we then start block sanding everything out and applying shadow casting. Once the block sanding and shadow casting is done, we then use our hands to feel for any imperfection.  We then roll the body and all parts into the paint booth for the paint process.  

Once in the paint booth, we will then apply an epoxy sealer to the entire car.  Most of the time the body is on a rotisserie so it makes it easier for us to paint the undercarriage of the car first.   With the epoxy sealer applied, we then have to wet sand, clean, clean, and clean again. Then all the body except the undercarriage is taped up and painted in black, red oxide or in the color of the body, whichever the manufacture called for.  Once the undercarriage is painted, we then bake it and dry it again. After the undercarriage is taped up, we start on the outside body of the car.  Everything is really perfected and gone over and cleaned again, then checked for any imperfections before applying any paint.  If we are doing a single stage paint job, then we apply single stage paint (which has the base coat and clear coat mixed together).  For a custom Hotrod, we use a two-stage basecoat/clear coat process. With the basecoat/ clear coat process, we apply the base coat, sand for any dirt specks, and then apply a clear coat. After the clear coat is dry, we wet sand with 600 grit and then allow everything to sit for 2 or more weeks to shrink up.  If the car is an older vintage vehicle, at Graveyard Run Restorations we go through a process that gets a single stage paint, much like the original paint was done. Once that paint is dry, we then wet sand the car down with 600 grit and leave it to sit for two weeks or longer to cure. After the paint has cured, we then re-paint with an additional flow coat of clear (this process can take up to 3 to 6 coats of clear) and once the clear is dry, it only gets wet sanded with up to 5000 grit. After sanding, we then buff the car using a 3-step process starting with rubbing compound, followed by hand polishing, and then a final buffing that gives you a deep glossy finish.

Look for our next blog on October 16th, 2020 for more about our Frame-Off Restorations Process.

Rachel Richardson and the GYR gang

Frame-Off Restorations Process (Part 2a – Bodywork)

Bodywork Process Part 2a

With the vehicle disassembled, your next process is bodywork.  The first thing we do during the bodywork process is to strip all the old paint off of the vehicle with aviation stripper until it is in bare metal. Once the vehicle is in bare metal, the next stage will be to media blast or dip in an acid bath which helps eliminate rust.  After the blasting and/or acid bath dipping stage, the vehicle will then be wiped down with a metal prep solution to keep it from rusting while doing any metal fabrication, woodwork, or leadwork on the vehicle.  The metalwork and leadwork stages are normally the longest processes for the vehicle.  During the metalwork stage, you will have to work the metal to get it back to the original shape it was in.  Sometimes a piece may have to be cut off and remade. While remaking a metal piece, this may involve a lot of cutting, grinding, shaping, lining up of the piece correctly and welding.  In some cases, such as the 1939 Packard, you will have woodwork.  If woodwork is present you will then have to take a lot of guess measurements because more than likely, the wood is rotten.  When dealing with rotten wood, you have to do a lot measuring, cutting, trimming, sanding, and pre-fitting to get it as it should be.  This process normally takes about 3 to 5 months, depending on how much wood is in the vehicle or in how bad a condition the wood is.

Once the metalwork and woodwork are done, you then begin adding lead to the car. The purpose of the leading is to fill in small dented areas that are hard to get out with metalwork or shaping and also to reinforce around any edges or seams.  The leadwork process is a labor-intensive job because as you are melting the lead, you also have to spread the lead out into the area you are wanting to apply it to.  Once all the lead has been applied, you then have to start filing and sanding it to make it smooth. After all the lead has been applied and smoothed, the exposed metal will again be wiped down with a metal prep solution. 

Check back about September 25 for the second part of bodywork – Painting.

Rachel Richardson and the GYR gang

Frame-Off Restorations Process (Part 1 – Disassembling)

When you want a “proper” restoration on your car, when do you expect the restoration to be finished? One big factor that you should consider when wanting a “proper” restoration at Graveyard Run Restorations is the time frame. At Graveyard Run Restorations, an average build typically takes about 1 to 2 years, or longer is some cases. 

With every frame-off restoration, we begin by reversing the factory’s assembly process.  During the disassembling process we label every single part all the way down to how many screws, nuts, bolts, etc. were removed from that part.  Also, with each part, we have to determine things such as: is this part salvageable? How rare is this part? Was the part that was taken off correct for the vehicle’s era?  If the part is determined not to be correct or needs to be repaired, then that is a whole other process that has to be researched separate from the tear down.  During the research process, we will in most case speak with one “old guy” who then sends you to another “old guy” who then send you to another “old guy” and so on.  With one person referring you to another person, that can sometimes take over a week to actually speak to a person who knows about the particular part you are inquiring about.   If parts are required to be sent out for repair, we sometimes run into a long waiting period, such as 6 months or longer, before they can repair the parts for us.  Once the vehicle has been disassembled and all parts have been labeled, tagged, and bagged, then someone has to look over the frame to make sure there is not any damage that can come back to haunt you in the future.

The disassembling process that we use on a frame-off restoration at GYR normally takes us about 2 weeks to 1 month. This ensures that everything is documented in detail to make it easy for GYR to put a vehicle back together correctly at the end. This only happens if the car comes to us fully intact.  If a vehicle shows up with parts in boxes and has had some other work done on it, that can make our process take longer.   We then have to figure out where the parts belong on the car (because we didn’t take them off) before bagging, tagging, and labeling them.  As you can see, tearing a vehicle down can take some time and even more so if it is delivered to us in boxes.  Check back in 2 weeks for Frame-Off Restorations Process (Part 2 – Bodywork and more)

Rachel Richardson and the GYR gang

Why it is hard to give an estimate on Restorations

With every build we do at Graveyard Run Restorations, we always get asked the million-dollar question, “Can you give me an estimate of what it will cost me to restore my car?”.  If you are wanting a restoration to look as pristine as the day it rolled off the assembly line, then that estimate you are looking for is not going to happen.

It’s hard to give an estimate because you never know what you’re getting into with some of these cars.  Especially the ones prior to the 1950’s.  Even with a car that has been barn kept for its entire life, it can have rust, mold, dry rotted wires, or have had a small animal living in it.  The outside body of a car can look great, but once you start tearing the car down you start getting into those areas that the eye never meets, and there lies the problem.  You can have rust in your quarters, under the dash, under the windshield frame, and etc. that will cause more trouble for you in the long run if not fixed properly.

Also, in some cases, your headliner and seats may look good but there could be mold hiding beneath it.  If that mold is not properly taken care of, you can have a nice car with a bad smell and the mold could even be spread.  With small animals everywhere, you know a car sitting is a perfect place for them to nest.  With them nesting, the small animals end up chewing on the wires which can only be fixed by a new wiring harness that was never in the discussion.

Another reason an estimate becomes hard to make for a restoration shop is the parts.  At Graveyard Run Restorations, we have gotten some rare cars and with rare cars, come rare parts with heavy prices.  The most recent restorations that we have done are a 1937 Chrysler Imperial and a 1954 Buick Roadmaster.  The biggest issue we had with the Buick was the A/C parts and the R-12 that it uses for the A/C system.  The Buick A/C parts are not manufactured anymore, which leaves us either making or restoring those parts or going on an extensive Internet hunt with lots of calls from one person to another.  With parts or components not being manufactured, that drives up the price to the cost of the build. The Chrysler ran into its fair share of rare parts as well. From things such as dash panel controls, hubcaps, antenna, foot pedestal for the rumble seat, and many more things that made it the vehicle of its era. Another example that we ran into with parts is, pre-made parts for cars in the 1960’s and 1970’s.  We have run into issues where we order a part that claims to be the exact fit of that car but then it isn’t.  If parts don’t fit correctly that means we have to make modifications to make it look as it should.

Benjamin Franklin once said, “Tell me and I forget, teach me and I remember, involve me and I learn.”  With this being said, the people of the 1930’s, 1940’s, and 1950’s that have the knowledge of these old cars are dying out and not passing this information on.  Reasons for this information to not be passed along is it’s no longer needed because of technology.  Also, in the earlier days, a lot of information you needed was written in a book.  With information available today at just your hands, why would someone depend on a book.  That now leaves all those books with the information you needed on a 1937 Chrysler or 1939 Packard just sitting around and eventually just being trashed and lost to the next generation who may be interested in restoring their great grandfather’s 1925 Chrysler.

Rachel Richardson and the GYR gang

Graveyard Run – February 2019

Hey everyone! The guys have been hard at work on the Coronet the past week, putting the gas tank in, then having to remove it due to a dent in the tank, installing the transmission and the engine! We also were able to install some of the smaller parts such as the windshield wash tank, fuel pump, and the oil dipstick and tube. It was a very exciting week for the Coronet once again and everyday we are closer and closer to finishing her up!

Mark and Harlan are still busy getting ready for Amelia Island. They were able to get the Chrysler polished and looking beautiful!

© Graveyard Run • Site designed by: FascinationDesign.com